Losing valuable items can be a stressful experience, but with the Apple AirTag, you have a powerful tool to help you locate your belongings quickly and efficiently. One of the standout features of the AirTag is Lost Mode, a function that enhances the chances of recovering your lost items. In this guide, we’ll walk you through everything you need to know about activating and using Apple AirTag Lost Mode, ensuring you’re well-prepared in the event you misplace something important.
What is Apple AirTag Lost Mode?
Before diving into the steps to activate Lost Mode, it’s essential to understand what this feature is and why it’s so valuable. Lost Mode is an advanced functionality that allows you to mark your AirTag as lost. Once enabled, Lost Mode leverages Apple’s expansive Find My network, sending out signals that can help you pinpoint the location of your missing item. Additionally, if another Apple device comes into proximity with your lost AirTag, you’ll receive an instant notification with its location.
Lost Mode also lets you enter a custom message that will be displayed on the phone of anyone who finds your AirTag. This can include your contact information, making it easy for the finder to reach out and return your lost item.
How to Activate Lost Mode on Your Apple AirTag
Activating Lost Mode on your Apple AirTag is a straightforward process. Here’s a step-by-step guide to help you through it:
Step 1: Open the Find My App
First, ensure your iPhone or iPad is connected to the internet, and then open the Find My app. The Find My app is pre-installed on Apple devices and serves as the hub for tracking all your Apple products, including AirTags.
Step 2: Select the Items Tab
At the bottom of the Find My app, you’ll see several tabs. Tap on the Items tab, which will show a list of all your AirTags and other items you’ve registered with Find My.
Step 3: Choose Your AirTag
Scroll through the list and select the AirTag that you’ve lost. This will open a detailed view of that AirTag, showing its last known location on a map and providing various options.
Step 4: Activate Lost Mode
In the detailed view, look for the option labeled Lost Mode and tap on it. A new screen will appear, guiding you through the process of activating Lost Mode. Apple will ask you to confirm that you want to enable this feature, as well as provide options to customize your Lost Mode settings.
Step 5: Enter Contact Information
Once you’ve confirmed, Apple will prompt you to enter your contact information. This is the information that will be displayed to anyone who finds your AirTag. You can choose to share your phone number or email address, depending on your preference.
Step 6: Add a Custom Message
You’ll also have the option to add a custom message that will appear alongside your contact information. For example, you might write, “This item is lost. Please contact me if found.” This message can be crucial in ensuring that whoever finds your AirTag knows how to return it to you.
Step 7: Enable Notifications
Finally, ensure that notifications are enabled. This allows Apple to send you immediate alerts if your AirTag’s location is updated or if it’s found by someone else’s device. Once you’ve completed these steps, Lost Mode will be activated, and you can close the Find My app.
How Apple AirTag Lost Mode Works
Now that Lost Mode is activated, your AirTag will start sending out Bluetooth signals that can be picked up by any nearby Apple device. When an Apple device detects your AirTag, it anonymously relays the location back to you via the Find My network. This vast network includes millions of Apple devices around the world, significantly increasing the likelihood that your lost item will be found.
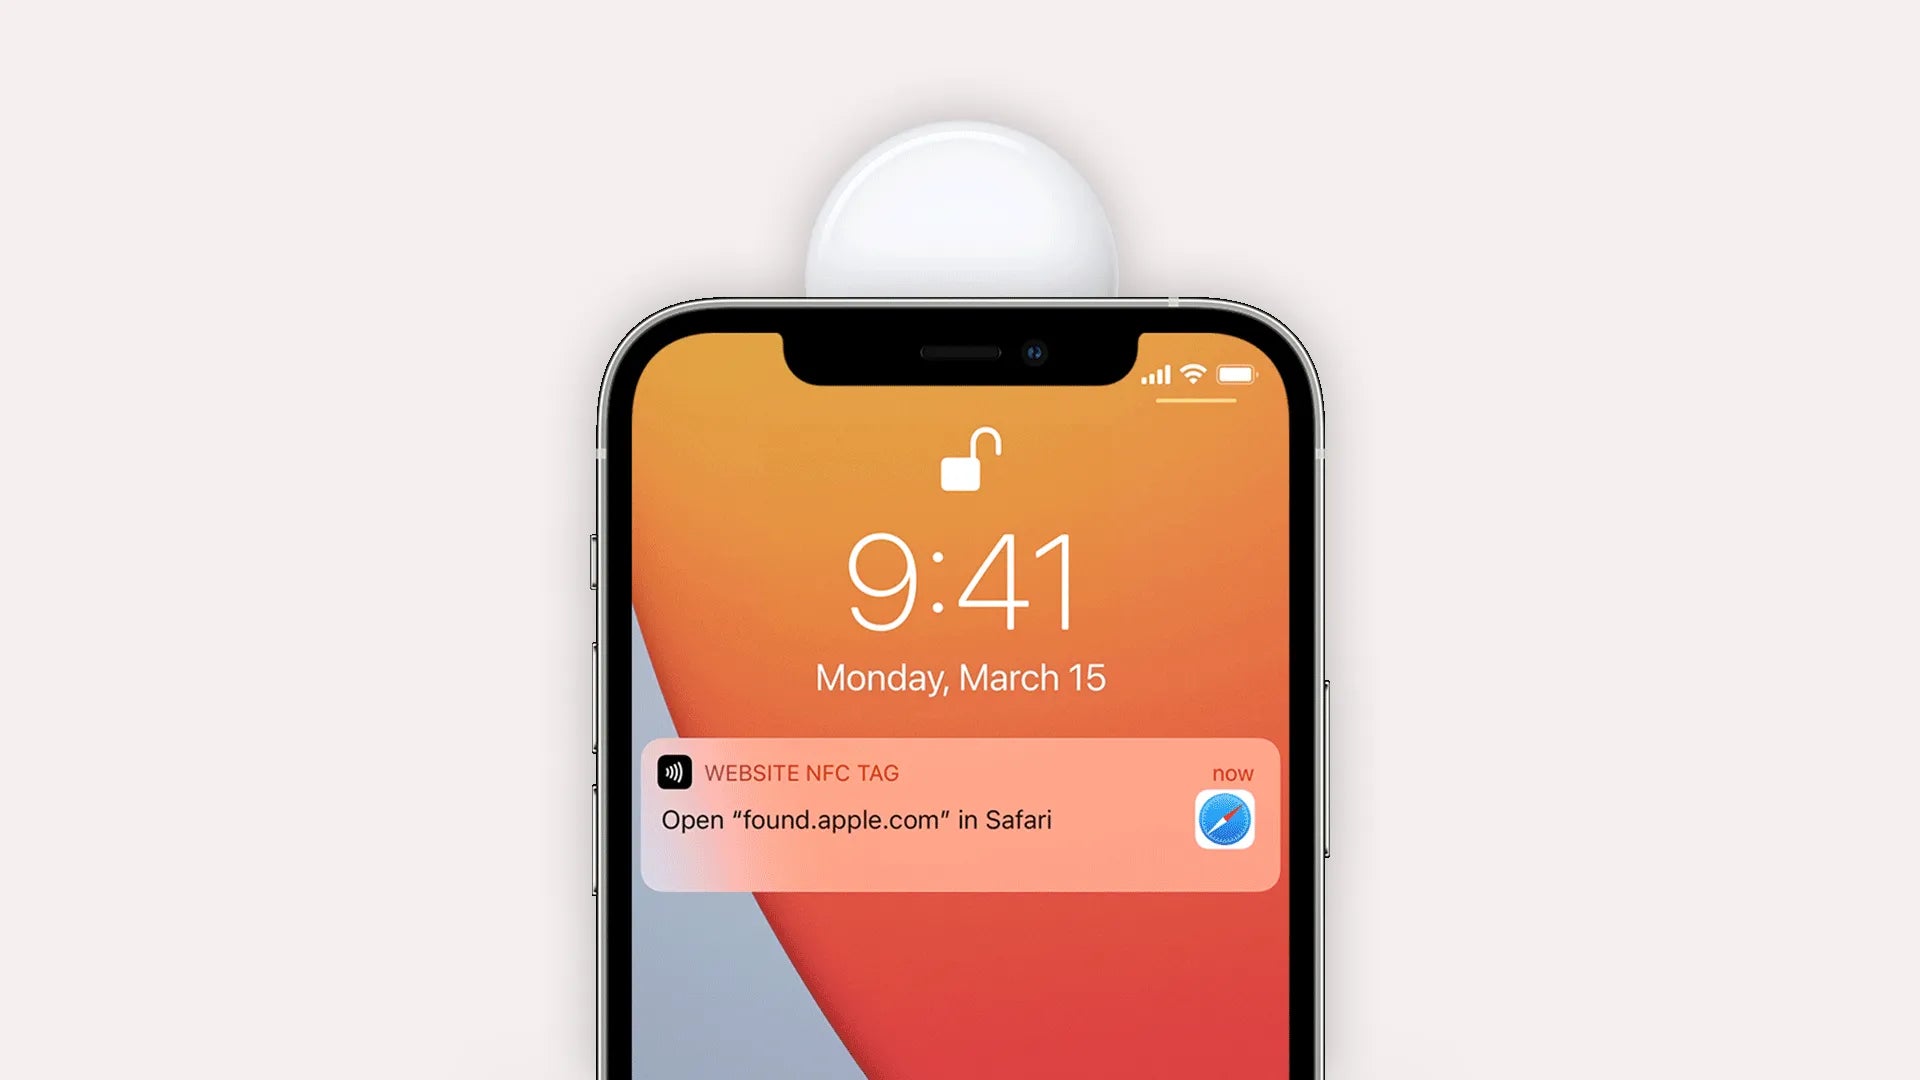
If someone finds your AirTag, they can tap it with their iPhone or any NFC-capable device. This action will bring up a webpage displaying your custom message and contact information, making it easy for the finder to reach out to you.
Privacy and Security in Lost Mode
Apple has designed Lost Mode with privacy and security in mind. The communication between your AirTag and the Find My network is end-to-end encrypted, meaning that no one else—not even Apple—can see the location of your AirTag. Additionally, the data shared with the finder of your AirTag is limited to what you choose to provide, ensuring your personal information remains secure.
Troubleshooting Common Issues with Lost Mode
While Lost Mode is generally reliable, there may be instances where you encounter issues. Here are some common problems and how to solve them:
1. Lost Mode Isn’t Activating
Ensure your device is connected to the internet and that your AirTag is within Bluetooth range when you try to activate Lost Mode. Restart the Find My app and try again.
2. Notifications Aren’t Being Received
Check that notifications are enabled in both the Find My app and your device’s settings. Make sure your device is not in Do Not Disturb mode.
3. AirTag Location Isn’t Updating
If the location isn’t updating, it could be because the AirTag hasn’t come into contact with another Apple device. Try retracing your steps or visiting the last known location to see if the AirTag is within range.
Final Thoughts
Apple AirTag’s Lost Mode is an incredibly useful feature for anyone who wants peace of mind when it comes to keeping track of their belongings. By following the steps outlined above, you can quickly activate Lost Mode and increase your chances of recovering a lost item. With the power of Apple’s Find My network, Lost Mode provides a robust solution that leverages cutting-edge technology to help you find what matters most.


Share:
iPhone Hidden Feature: Set Messages to automatically delete verification codes
AirPods Max: The Ultimate Guide to Features, Benefits, and Buying Tips